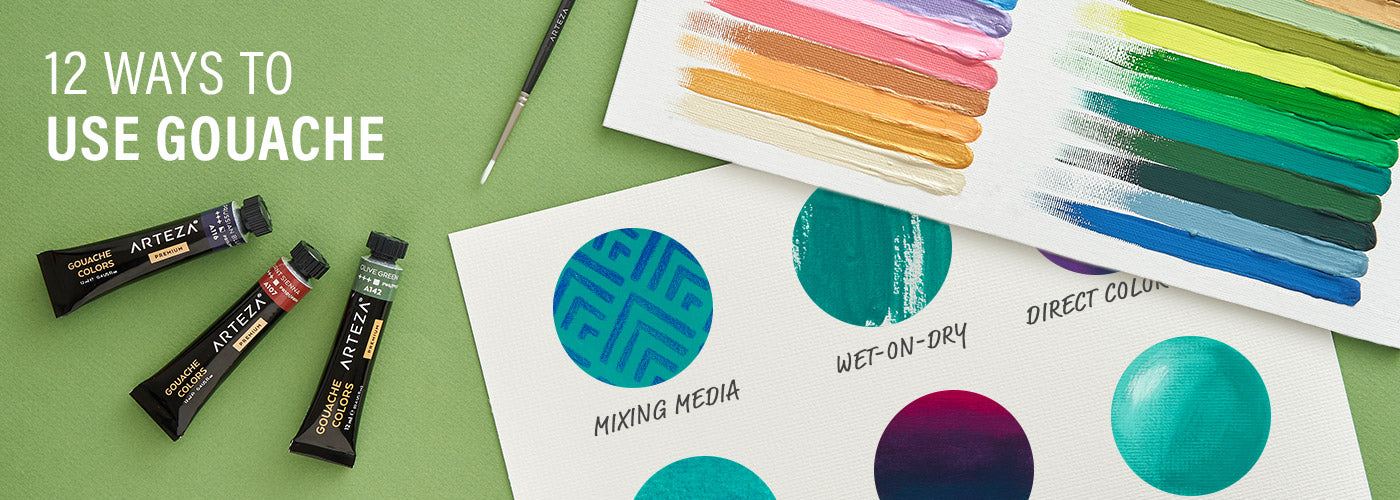
Have Fun Painting with Gouache


Gouache (pronounced “gwash”) is a water-soluble paint that combines the best aspects of both watercolours and acrylics for a paint that’s versatile and easy to use. Because it can become transparent when thinned with water, it acts like watercolour paint. Yet, unlike watercolours, it can be worked from dark to light and you can paint in white areas. Since it contains a lot of pigment, it is thick and opaque like acrylic paint. But, unlike acrylics, which once dry can’t be reworked, gouache allows you to return days later and alter the paint.

Make Swatches for Easy Reference
Swatches take the guesswork out of wondering what colours look like on paper or canvas. Simply put small dollops of Arteza Premium Gouache in rows, leaving space underneath the rows. Take a palette knife to create a single stroke of each colour.
Discover the Versatility of Gouache
Glazing

Gouache dries very fast and has the ability to become transparent enough to be used in a technique called glazing. By thinning the paint with water, you can layer it on top of painted areas that are dry to enrich an existing colour or create a new one. Glazing can create dark shadows and deep atmospheric effects. To do this, gradually mix water to your paint and experiment with different levels of transparency, as we have done here.

Mixing Media
Gouache works well when used in combination with other art media. You can add interest, new colours, or intricate details to your works when you use watercolour pencils, charcoal, markers, or coloured pencils, as we’ve done here, along with gouache.
Reworking Dry Areas

Because gouache dries fast, one of the best features of gouache is its ability to be reworked once it has dried. To try this, paint a solid rectangular area and allow it to dry. Using a paintbrush dipped in water, paint along the edges of the rectangle. As the paint rehydrates, it softens into a liquid again and you are able to blur the edges.
Dry Brushing

This technique involves putting paint on your brush and then rubbing most of it off. This is known as dry brushing and can achieve multi-tonal effects as well as creating the look of a textured surface. Simply dip your brush in the paint and then rub it a little on a palette or a paper towel. Now take the small amount that’s left on the brush and apply it to your paper or canvas. See how it adds dark and light values of your colour? It goes from a very solid colour, to more transparent so you can see the texture of the paper underneath. Use this technique in your paintings to create textures, highlights, or backgrounds.
Direct Color Mixing

Due to its thick and creamy consistency, gouache can be mixed directly on your painting. This ability to blend within the work helps to create subtle colour changes that are so essential in realistic paintings. Experiment with this technique by applying colour on one side of the paper and then another color next to it leaving space between the two. Gradually add a little of each color to the other, blending them closer together until they meet in the middle.
Mimicking Watercolor Paint

It’s easy to get gouache to mimic its cousin, watercolour. You can even use gouache and watercolour paints together. To achieve the look and feel of watercolour, just add more water to your gouache. See how transparent it becomes? If you use this paint on damp paper, you will get the same spreading, feathering, and blooming effects you get with actual watercolour paint.
Creating Volume

Adding volume to an object is done by placing different values of a colour to suggest which area the light is shining on and which area is not receiving any light. The palest values of your colour will be where the light is shining. Where there is no light, the value of your colour will be the darkest. To do this, use one basic colour and white. Take a little of each and mix them together to be your middle tone. As you can see, the light is shining here from the left, so the top of the ball is where pure white and white mixed with a bit of green is placed. To make the ball look round, add your middle tone next and work your way to the bottom of the ball, adding more of your basic colour until you are using only the basic colour for the darkest value.
Wet-on-Dry

Applying paint directly to a dry surface is known as the wet-on-dry technique. Because of the creamy texture of gouache, it goes on smoothly to dry paper or canvas and dries to an opaque, matt finish. To add more fluidity to your application, just add slightly more water.
Wet-on-Wet

Now that you’ve seen what gouache does on dry paper, let’s look at what it does on wet paper. This is the wet-on-wet technique. Just dampen your paper. Apply the paint and see how it begins to spread and the edges become soft? This is a lovely effect to use when painting water or adding atmosphere to landscapes and horizons.
Сreating Gradients
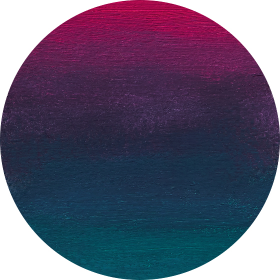
As you saw in the Direct Color Mixing technique, the consistency of gouache makes it extremely blendable. Whenever you are trying to get subtle gradients of colour, either on the palette or on the painting, you can achieve a wide range of colours by simply picking up a little of one colour and blending it with another. Here, we’ve created gradients that range from fuchsia to violet to indigo to blue to turquoise to green. Start with one stripe of colour and blend in different colours to create your own gradient swatch. How many different colours did you get?
Improvising

Be brave! There are so many unique effects you can create with gouache. Try using completely unexpected things to paint with — twigs, crumpled paper, cutlery, feathers, or your toothbrush. We used a sponge here and see how interesting this looks?
Using Colored Surfaces

The opaque quality of gouache paint makes it ideal for painting on a coloured surface. As you can see here, we’ve created an intense mood by using green mixed with a little white on a black background. Experiment to see how many moods you can create using different colours of paper.
Give Gouache a Try
Now that you’ve seen all the ways you can use gouache, you’ll understand why gouache illustrations, paintings, and sketches are so much fun to do. So, the next time you see the paint with the funny name, don’t just wonder how it’s pronounced, load up your palette and give it a try to create your own cool and fun paintings using Arteza Premium Gouache.
Leave a comment